Improvise with the Habanera

In a recent post, I gave you improvisation ideas using the harmonic minor scale. One place that this scale shows up is in the Habanera (often confused with the tango). I’ll repeat the notes about tuning that I gave you then:

If your harp is tuned in C (or you’ve put up your levers for C), engage your G# levers. In your left hand, play the following chords in succession (called a chord progression): Am, E, F, E. (The notes in those chords are ACE, EG#B, FAC, and again EG#B). Let’s use 4/4 time and play the chord just on beat 1, changing chords every two measures.

By the way, if you have only F, C and B levers on your harp, disengage the B’s to create Bbs, and then engage the C#s. Now your harmonic minor scale is Dm. Play Dm, A, Bb, and A chords to go with this scale, and avoid the C# when playing the Bb chord. (Chord notes are DFA, AC#E, BbFD, AC#E).

Okay, so here’s the fun NEW part. Below is a simple pattern of chords in Am with the traditional Habanera rhythm. (If you’re playing in Dm, use the same pattern on the Dm, Gm, A, and Dm chords, with your C#s for the A chords).

Habanera

(click image for larger version)

Play through the chord changes with your left hand until you can do it without too much thought. Then you can start adding simple notes in your right hand. Try repeating just the chord roots (A, D, E and A) in your right hand in a rhythmic pattern, for example. (That would be D, G, A and D in Dm).

Of course, you can play the chords in any order and make up beautiful melodies for your right hand as you get more comfortable. Try to improvise for at least 20 minutes just to allow yourself to get bored with the pattern. Boredom means you’ve got it, and that’s when something new and magical can happen!

Have fun!

This post is adapted from material that I originally published in the ezine, Notes from the Harp.

Improvise with the Harmonic Minor Scale

Why improvise with the harmonic minor scale?  For starters, it’s a lot of fun.  The harmonic minor scale has a moody, mysterious sound, and almost anything you play will sound great.

If your harp is tuned in C (or you’ve put up your levers for C), engage your G# levers. In your left hand, play the following chords in succession (called a chord progression): Am, E, F, E. (The notes in those chords are ACE, EG#B, FAC, and again EG#B). Let’s use 4/4 time and play the chord just on beat 1, changing chords every two measures.

Now, in the right hand, you may play any notes, but you’ll notice that when your LH chord is F, the G# sounds rather dissonant, so you might want to avoid it on those measures. That same G# gives the harmonic minor it’s distinctive sound, creating the E major chord instead of an E minor chord. Whether you understand that music theory or not, you can have fun experimenting with this scale.

Glissing and fluttery patterns are very satisfying with this tuning. Let go of looking for the “right notes” and just experiment.

By the way, if you have only F, C and B levers on your harp, disengage the B’s to create Bbs, and then engage the C#s. Now your harmonic minor scale is Dm. Play Dm, A, Bb, and A chords to go with this scale, and avoid the C# when playing the Bb chord. (Chord notes are DFA, AC#E, BbFD, AC#E).

Most of all, have fun!

This post is adapted from material that I originally published in the ezine, Notes from the Harp.

Practicing By Listening

When you are learning an unfamiliar piece, don’t overlook the value of practicing by listening. Hearing a piece is a vital part of learning it, and can speed up the process tremendously. Just as visualizing is an overlooked practice strategy, listening barely registers on the list for most students and even some harp teachers. My grandmother, an old-school piano teacher, used to warn me that listening to recordings of a piece I was learning would interfere with my own interpretation of a piece. Little did she understand how valuable that listening could have been, saving me countless practice repetitions of pieces full of wrong rhythms, inappropriate tempi and even wrong notes.

While the fear of copying someone else’s interpretation dies hard in some circles, your harp teacher will probably be open to playing a piece for you, as well as helping you find at least one recording of it. Luckily, my harp teacher believed in the power of listening and even suggested I make a compilation of all the pieces in my recital to listen to religiously. Active listening, with the score in front of you, will make you much better at listening while you play, helping you avoid that dreaded automatic-pilot state where we don’t hear our own music.

But even listening to recordings while doing other things (my favorite is while driving) will drastically speed up training your ear and making the piece “yours” from the inside. Likewise, it will ultimately help you interpret the piece with knowledge and sensitivity. Instead of restricting you, listening provides fresh inspiration that actually deepens the possibilities of your interpretation of your piece.

Finally, don’t forget that attending live performances, no matter what pieces are played, is unbeatable training in music. Even if the concerts available in your area don’t include harp, drink in all the live music you can find. If you love Celtic music, pay attention to what singers and instrumentalists of all kinds do to translate its magic, and think about what you would do in their place. All of this listening will enrich your playing beyond your imagination.

This post is adapted from material that I originally published in the ezine, Notes from the Harp.
Improvising with Two Chord Vamps

The Power of Two Chord Vamps

What do you do if all those chord progressions confuse you and you want to start with improvising? One of the simplest, most satisfying ways to start is improvising with two chord vamps. You can choose any two chords that sound good one after the other, and you can play each one twice before changing. Here are some options to try on a harp tuned in C:

Dm and C (dfa, ceg)
Am and G (ace, gbd)
C and Am (ceg, ace)
G and F (gbd, fac)

For now, you don’t need to worry about the theory behind these choices. All you need to do is find the chords. (Here’s a pdf that can help: building-chords-on-the-scale).

In fact, if you’re a real beginner, all you need to do in your left hand is find the first and final note of the chord and play them together.  The interval between these two notes is called a fifth.  Open fifths in the bass range of the harp have a nice, open sound. For example, instead of a Dm chord, you would play just d on the bottom and a above it, usually with fingers 3 and 1.  Choose a count, like 4, and play this interval  only on beat one as you count 1, 2, 3, 4.

As soon as that’s really easy, start noodling around with your right hand. To begin with, if you stick to the notes that are in the chord, plus the two open strings between them, you can’t go wrong. Play with single notes, repeated notes, and simple but varied rhythm–nothing so complicated that you lose the left hand pulse on beat one. Remember that simple notes on the harp are heavenly, and have fun!

This post is adapted from material that I originally published in the ezine, Notes from the Harp.
Harp Hand Coordination

Many students struggle with the task of coordinating their hands, especially as they move in different directions at different times and with different placing groups. If you find yourself in a stuck place with the piece you’re learning, don’t just keep “trying” to make your hands work together. Instead, try one of these magical techniques for laying down the pathways in your brain and body that will help you, not only with this piece but with those to come.

Assign one part of the music (either hand) to another part of your body. Sing it, tap it with your foot or on your lap, or say nonsense syllables (doo bee doo be do) that fit the music while you play the other part on the harp. You may feel silly, but you will make more progress this way than you can imagine.

Try tapping the rhythm of each part with your two hands, on your lap (no harp required).

Or, tap one part with one foot, and one with one hand. Cross your body; in other words, use your left hand or foot for the right hand part and vice versa.

While we’re on the subject of crossing, try simply playing the right hand part with your left hand (alone) until you can do so relatively smoothly, and then learn to play the left hand part with your right hand. If you’re really brave, you can try them together, but this isn’t necessary.

Now, after all the crazy experiments, put your hands together as originally intended and see what happens!

This post is adapted from material that I originally published in the ezine, Notes from the Harp.

Stop Harp Buzzing

Buzzing is the bane of many a beginning harper. It’s especially hard to play “note-y” chords in the bass, because those strings, whether wire or wrapped nylon, vibrate in wider patterns. You can see them moving for a long time. So what is a harper to do to stop harp buzzing?

First, check for hand position. Notice if you’re catching that vibrating string with a fingernail. If so, change the angle of your fingers so that you will avoid the nail. Usually, students are placing from above, or sideways, making it all but impossible to avoid buzzing. The answer is to place from below. Keep your fingers down after they close open your hand right to the notes and replace them without “breaking the plane” with the top of your hand, and a lot of buzzing will disappear.

Another way to think of it is this: are your fingers closing and opening below your knuckles? Or are you allowing your hand to twist or pull out of it’s good harp hand position?  If you buzz, stop immediately and figure out which finger is hitting which string at which point as you place, and adjust that finger’s position.

The second thing to check is timing. Often, buzzing happens because you’re over-anticipating when you place. Yes, you want to place in advance, but at exactly the right time. Place just before you’ll play, and with deliberateness. Hesitation will always create buzzing, as will sloppy placing of a group of notes as less than a unit.

Finally, play the passage very slowly, changing your hand position ever so slightly until the sound is clean. Now do it again, and if it’s still clean, figure out just what you did to get that sound. Remember, you are ultimately the only one who can determine what fine adjustments in your finger angle or approach will allow you to “land” the notes without buzzing.

Once you know what to do, practice it until you do it automatically. You will get it, I promise.

This post is adapted from material that I originally published in the ezine, Notes from the Harp.
4 Prerequisites Every Adult Harp Student Needs

This post is about the prerequisites for learning to play the harp.  Do I mean reading music?  Or piano experience?  Or some other musical background?   Breathe easy; those things are lovely to have but absolutely not necessary.  Instead, you need these 4 attitudes to get started with your harping adventure and to return to when you feel frustrated (that’s inevitable) and need some inspiration.

otter-with-harp

So, here are my 4 prerequisites every adult harp student needs:

1 – Honor yourself enough to make time for what delights you

This means you have to follow your own heart and notice what delights YOU. Try lots of new things and revel in what you love. On the larger level, allowing yourself to learn, allowing yourself to put time at the harp above all the other demands that crowd your life, requires that you honor your delight for the harp and your right to play it.

I tell my students that life is too short to play things you hate. This means it’s up to you to abandon a piece you loathe, especially if you’ve already conquered the technical skills in it. If you haven’t yet gained those skills (like 4-finger arpeggios or harmonics), try to find a piece you love that will draw you to practicing them.

2 – Become an unapologetic “imperfectionist”

If you spend all of your time at the harp worrying about your next mistake, or your last one, you cripple your ability to enjoy music. Having a goal, trying to learn something new, using practice strategies to gain fluency at the harp–these are all laudable and important.

How do you get to your goals? By getting of your own way, letting the mistakes happen, and then looking at what happened with the open curiosity of a detective. Brains don’t learn without mistakes. If you need help with this step, I heartily recommend this book:

The Perfect Wrong Note, by William Westney

3 – Step out of your comfort zone

Learning a complex new skill requires us to be–GASP–a beginner. You’re a bright, articulate, competent adult, fearful of looking foolish (or worse, “stupid”). Reframe this fear: “Foolish” can mean simply playful and uninhibited; you’re never “stupid” simply because you don’t know something, so acknowledge the fact that you will never run out of wonderful new things to learn.

If you already knew everything, wouldn’t life be truly uninspiring? Greet that new land of music (note reading? harp technique? improvisation?) as the juicy possibility it is to make endless, exciting discoveries. You’ll be amazed at what you can actually do once you put the focus on the new skill, rather than whether you feel awkward or not. Which brings me to . . .

4 – Share your joy

When its time to play for anyone–your teacher, your neighbor, your yoga class, or simply your loved ones–remember that you love music. You love the harp, you love these sounds, you want to share them from that inexhaustible source of passion. It’s not about you, but about giving someone else a glimpse into this magical world.

If you set an intention, and focus on that, and let the music arrive in your heart BEFORE you start playing, then you are giving the gift of real presence. When you make a mistake, come back to the intention, the sharing. We are all on your side, and it is, after all, a harp!

This post is adapted from material that I originally published in the ezine, Notes from the Harp.

Musicality: Playing from the Heart

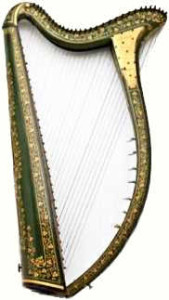
antique harpSo, you finally know all the notes in that piece you’ve been learning. You can gracefully move from one placing bracket to the next, play both hands together, and smoothly play your way through. But something is still missing. Instead of sounding like Music, your piece sounds somehow rough and unfinished. Why?

So far, you’ve approached your practice goals in typical practice fashion: play, rinse, repeat. If you’re smart, and you have a good teacher, you have used strategies like taking out practice spots (instead of always starting at the beginning), analyzing the patterns, looking at the shapes your hands make on the harp, tapping counter rhythms, and so on.

You have enlisted the help of your kinesthetic, visual and auditory senses, using them to teach your body and brain a pretty neat new trick. All this time, your brain has been working overtime. But without your heart, the music will still sound mechanical, however expert.  Perhaps you’ve been able to think musically as you learned, which is of course the ideal. Next time you start a piece, see if you can use the tips in the rest of this post to make musical decisions AS you learn the hand positions, notes and rhythms.

Music teachers debate whether or not anyone can teach “musicality”. We can show students how to create dynamics, talk about phrasing, practice articulation, but only the musician can decide how to use these tools. How does the musician decide? With her heart.

I probably can’t teach a student exactly how to bring the music through her heart (and I wouldn’t want to), but I can sure help her open the door to doing that for herself. And isn’t that the whole point of learning to play the harp?

Think back to when you first fell in love with harp music. You heard a harpist ~ at a wedding or concert or simply on a CD ~ and you were entranced. Somehow, since then, you may have forgotten to listen, to breathe, to sink into the music.

Listening to ourselves is really difficult, especially when our brains are concentrating so hard that we literally forget to breathe. Sinking into the music? Wouldn’t that require that I play without thinking?

In some ways, that’s exactly the goal. Think of it as giving your brain a well-deserved vacation.

Teachers often talk about finding a way to make the song yours ~ a cliché suggestion, no doubt, and besides, what does it mean? It means this: you enter the song with your own personal story, your own past, your own feelings. You become present. Once you do that, you will not play the piece in the same way.

Is the piece already “yours”? Have you sung it, not once, but many times? Can you waltz around your house singing the melody of your piece? Can you hear the whole piece in your head?

Can you visualize yourself playing your piece? When you sit at the harp, can you listen for the music and then “catch the stream” and join in, effortlessly?

I guarantee that singing ~ that one, magical key ~ is the fastest way to unlock the heart. Try this experiment. Play one line of your piece, just the way you always do. Now, take a deep breath, hear the line in your head, and sing it as you play it a second time. Do you hear the difference?

If your song has no words, why not make some up? It doesn’t even matter what someone else thinks the song is about—what is it about for you? Make up new words that resonate for you alone.

Why does singing work? Does it matter? For those who want reasons, I’ll give you my theory: whether we are “singers” or not, our voices know how to shape music, just as they know how to shape speech.

Do you think about cadence or phrasing when you talk? Unless you’re a professional speaker, my guess is that you don’t think at all about your voice as you tell a story. You own your words and use inflection, pitch, and a whole host of other tools without even knowing that you know how.

As a harpist, your goal is to be able to use your fingers as your voice. By using your voice while you play, you create a magical bridge between your heart and your fingers that makes this possible.

Singing is the fastest route into the heart of your music, but here are some others. Write a story for your song. Paint a picture, or even a map, that embodies the music for you. Find a photograph that represents your song. Put it on your music stand and look at it while you play. Pick someone you love and play the song for them, whether they can be there physically or not.

Now, you will notice a funny thing if you follow even one of these suggestions. You will fall in love with your music, and with your harp, all over again.

That skeptical voice in you, the one that says “You shouldn’t waste your practice time on all this goofy stuff; you should be working your practice spots and doing your exercises . . .”, is just plain wrong. Why? Because falling in love IS your ticket to the heart of music. Yes, you need your technique, and you need to train your hands, and you need to work on your rhythm. But without the heart of music, none of those things will matter.

Oh, and one last and important thing. Early in this article, I said this: “Listening to ourselves is really difficult, especially when our brains are concentrating so hard that we literally forget to breathe.” The next best thing you can do for your harp playing ~ after singing ~ actually solves this dilemma. Here it is: record yourself.

One of my music mantras goes like this: All Notes are Not Created Equal. As you listen to your recording, put on special ears, not for any notes you may have missed, but for which notes stand out. You will notice that some notes are too shy, and some notes are too bold, or perhaps all the notes are jostling for attention and thus melt into a sea of conformity.

One of my daughter’s piano teachers used to ask her to draw hearts around the juiciest notes ~ the notes that soar at the top of a line, or surprise you out of nowhere, or somehow make your heart just feel happy to hear them. These are the notes that need extra loving as you play.

I’m not going to tell you how to love them; that is up to you. But here’s a hint: all those fabulous musical tools of expression are yours to use, if you let your heart decide.

Find your own heart notes and then play (and record) again, loving those notes as you go. Better yet, sing and play and record again. See what happens.

This post is adapted from material that I originally published in the ezine, Notes from the Harp.

Improvise with Whole-Tone Scales

… But let’s call it “galaxy music”…

Here’s a fun improv starter that especially appeals to the child within all of us. Fix your levers so that you have the following scale: C D E F# G# Ab (or A#, either one; you’re just eliminating the A by doubling a musical note) Bb C.

whole-tone scale

(click on image for larger version)

Now play with running up and down the scale, glissing, and playing random notes. Sounds like what we think of as space music, don’t you think? If you play certain intervals between your two hands it can sound very eerie.

You can also try using A-natural in this exercise, although that isn’t strictly speaking part of the whole-tone scale (hey, did you know you just learned some theory? You now know how to improvise with whole-tone scales . . . ). Have fun with this; there are no wrong notes.

This post is adapted from material that I originally published in the ezine, Notes from the Harp.

Get Off That Practicing Plateau Without Even Playing

Practicing plateaus–we all have them. Do you remember when you used to wake up, already excited to get to the harp and practice?  Has it been a long time?  Do you feel stuck, as if your practice really isn’t moving you forward?  That’s the very definition of a practicing plateau, and it happens to all of us. Believe it or not, there are many ways to get off that practicing plateau, many of which don’t even involve playing the harp.

This post is about all those ways you can practice, learn music and harp technique, and improve your musicianship. For most of these suggestions, you don’t even need a harp!! But by far the best news is this: all of these techniques will give your harp playing a big jump start. So if you’re stuck on a practicing plateau, do something completely different! (Remember Einstein’s definition: “Insanity: doing the same thing over and over again and expecting different results”? This applies to music seven times seven).

Clapping Rhythms

If you are starting a new piece, or even practicing something you know pretty well but stumble sometimes over the rhythm, stop playing it badly and do this instead. Clap the rhythm until it’s totally easy. If you need to do two counter-rhythms, the easiest way is to tap one on each leg, or clap one and tap the other with your foot.

You can also use the metronome to play one rhythm (say, eighth notes) while you clap the other (say, triplets) over it. (This suggestion came from my daughter, a student at Interlochen Arts Academy and a passionate French horn player).

Only when the rhythm is easy with your hands and/or feet should you try the piece on your harp. A little patience with this seeming delay will net you huge gains in learning your music.

Dancing & Singing

Take the clapping idea a step further and do it with your feet, dancing your piece around your living room. If you sing while you dance, that’s even better. You’ve heard it before but it’s really true: if you can sing it, you can play it. My teacher has always had me singing the jazzy rhythms I love with do-wahs. Have fun and get the rhythm “in your body” at the same time!

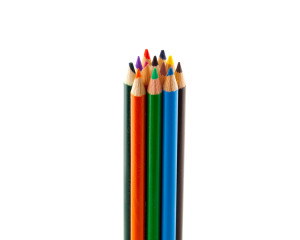
Colored pencils

Mental Practice: Score Review

If you want to really know your piece, even if you don’t plan to memorize it, study the notation away from the harp. Use a highlighter to mark lever changes, dynamics, and other things you might otherwise miss. Use colored pencils to color code the repeating patterns.  Write in chords, fingerings, and brackets. Draw a colorful star or arrow to mark the beginning of each section; this way your eyes will go right to the spot when you need to glance at your music.

If you don’t want to mark up your music, try putting it in page protectors and then using wet-erase markers. Later, you can erase the marks and get back to your clean score if you want to.

Color is a wonderful learning aid! Sometimes, I ask a visually-oriented student to map an entire short piece with colored lines on a plain piece of paper. This process will teach you a lot about the texture and design of the music.

Visualization

Go one step further with your mind and visualize playing your piece perfectly. Don’t just imagine the music in front of you, though you can do that, too. Imagine your hands playing each passage with grace and the dynamics you want. I like to do this when I’m about to fall asleep. Experiment with what works best for you.

Arranging and/or Learning Music at the Computer or Playing on Another Instrument

If you want to really know a tune, use music notation software to arrange it, or at least to notate your own copy. Notation software will also play the music back for you, which can be a great boon for learning!

If you don’t use computer notation software, you can write out the piece by hand, which is great kinesthetic reinforcement. Another idea is to try playing your piece on another instrument. Of course, a piano is great if you have one handy and know how to play it, but how about picking out the melody on a recorder or xylophone?

Listening

This idea may seem obvious, but when was the last time you listened to a recording of the music you’re practicing? Repeated listening will really teach you the intricacies of the music. Worried about copying someone else’s style? Relax. It would be almost impossible to sound like Kim Robertson or Deborah Henson-Conant anyway, don’t you think? You will always play with your own personal quirks, and that’s as it should be. However, you can purposefully try to play the piece with tempo, dynamics, or other features of a great performer. It’s a wonderful way to learn.

(Later, if the recording isn’t too fast, you can even try playing along. Some music comes with CDs that lend themselves to that. Though this is outside the subject of this article, it really helps and can also get you off your practicing plateau).

Music Theory Study

Last, but not least, no matter what level you play at, you can vastly improve your understanding of music by studying music theory away from the harp. If you’re a beginner, drill your notes and rhythms with flash cards.   Whether you’re brushing up on notes, intervals, key signatures, or chords, you can find lots of resources to help you.  Use an app, or drill at the computer with drills like these.

I hope you use these practical ideas to shake up your practice and move from any plateaus you’ve been experiencing. Let me know how it goes!

This post is adapted from material that I originally published in the ezine, Notes from the Harp.

Photo by GeoffreyWhiteway, courtesy of and copyright Free Range Stock, www.freerangestock.com